UV Texture Mapping actually involves two majors. The first is to unwrap the model into a nice, non-overlapping UV Map and the other is to paint the actual textures in a program such as photoshop.
|
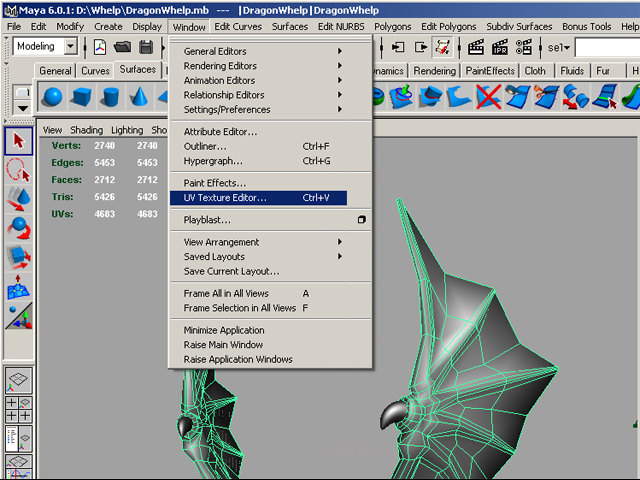
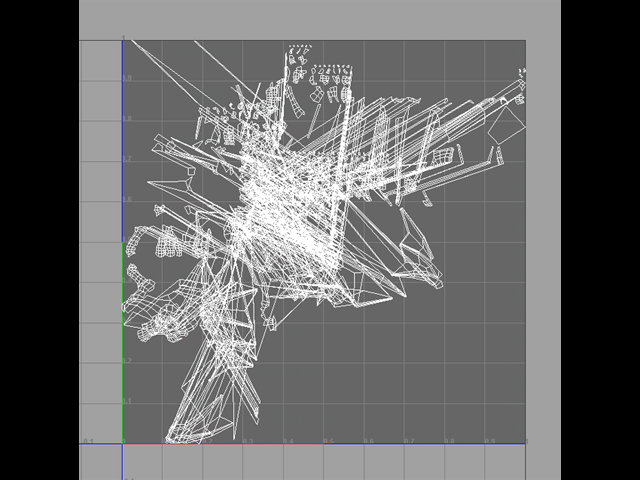
1: Most of the work of unwrapping the model will be done in the Window -> UV Texture Editor. This panel is under the Windows Menu. As you can see, the UV map for the model right now is not very clean or organized. Placing an external texture onto this map will create really bad results.
|
|
|
| | | |
|
|
|
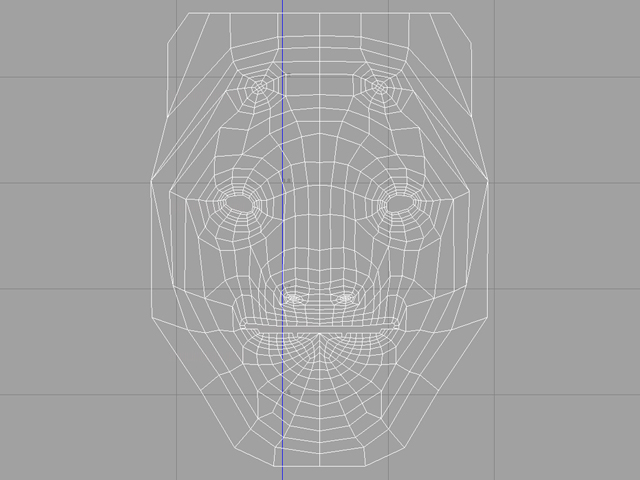
2: To make the UV Unwrapping process faster, we first divide the model in half. This makes it so that we only need to Unwrap half of it. We can then duplicate the other half and it will remember all the uV mapping you did for the first half.
|
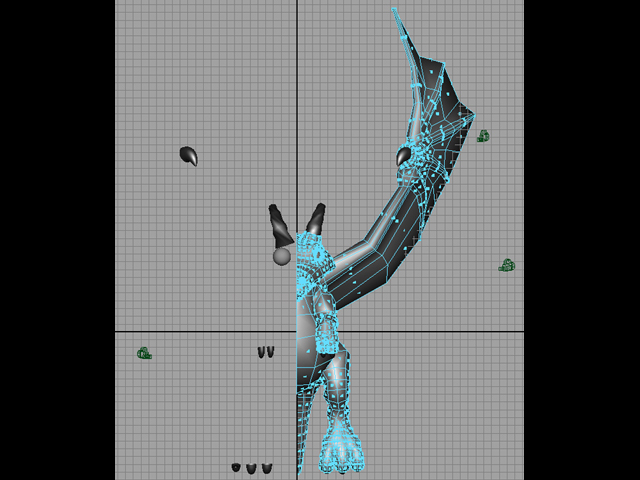 Select all the faces on the left half of the model and delete it. Select all the faces on the left half of the model and delete it.
|
|
|
|
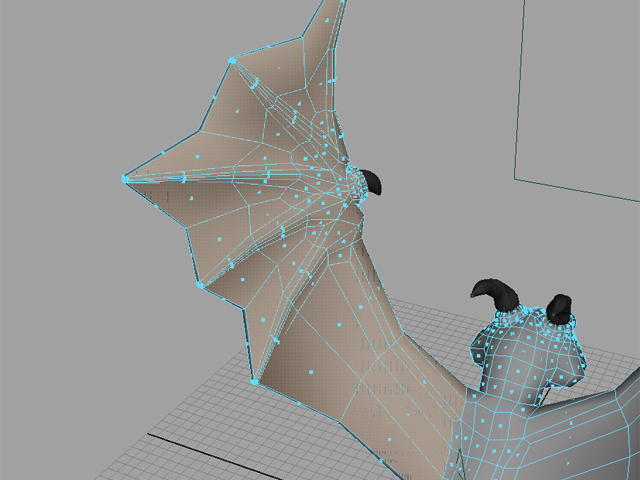
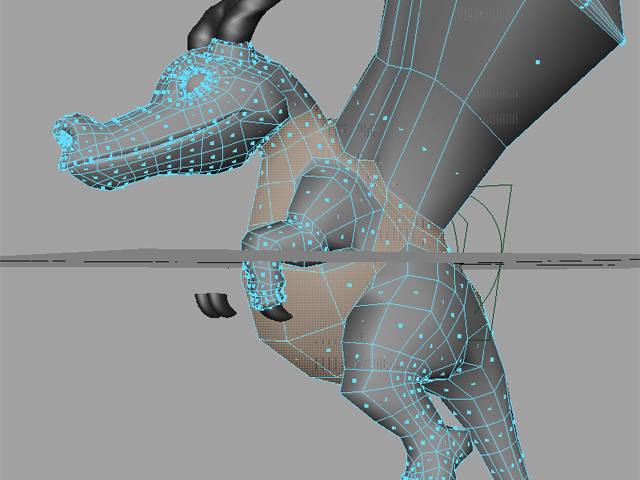
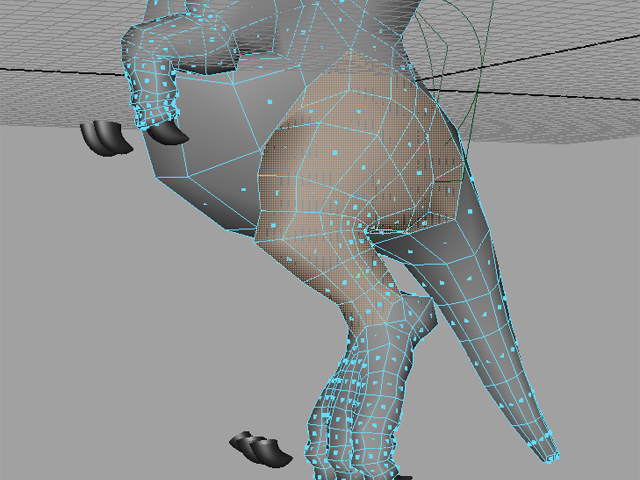
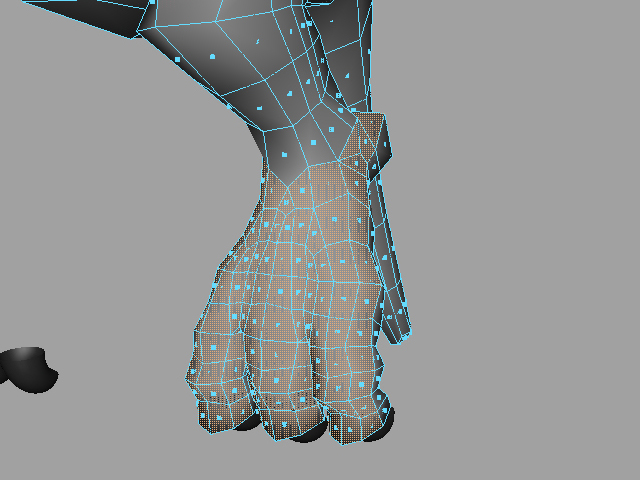
3: Next, you have to decide how to divide your model into various patches. For this "dragon whelp" model, here's how I decided to seperate it. I am not actually extracting the faces, but just demonstrating where I feel the divisions would work best for the texture map.
For each selection, you can also save it into a Set so that you can reselect all the faces without having to painstakingly pick 1 face at a time. After selecting the faces that you want, go to Create>Sets>Quick Select Set and give it a name. Now you can easily select all those faces in the outliner.
|
Tail
|
Head
|
Front of Claw
|
Back of Claw
|

Arm
|
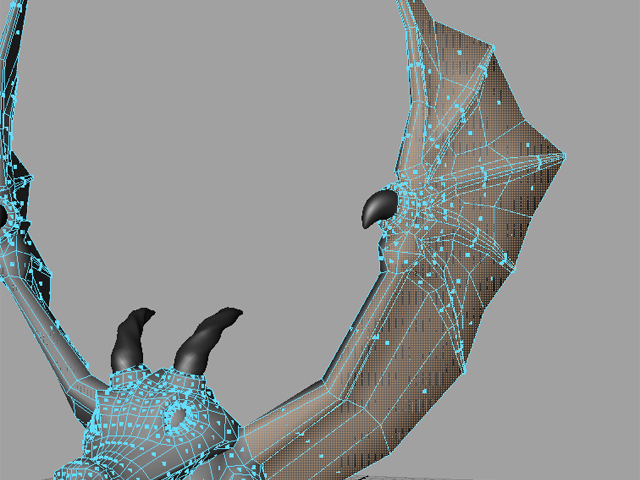
Bottom of Wing
|
Top of Wing
|
Body
|
Leg
|
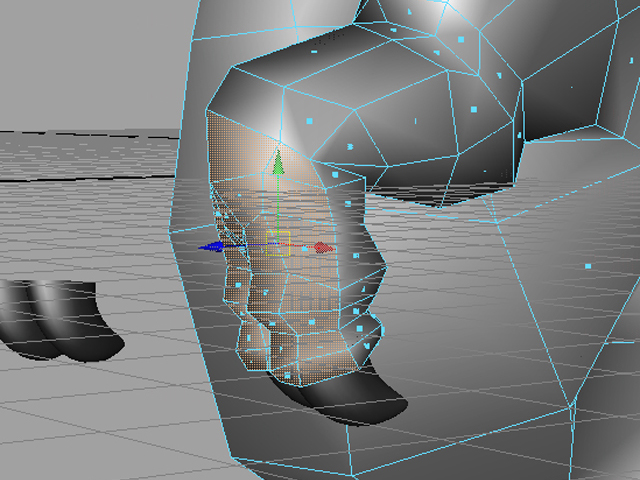
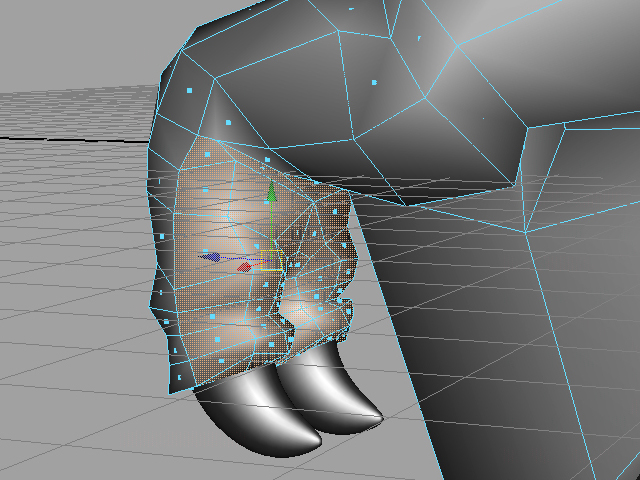
Front of Feet
|
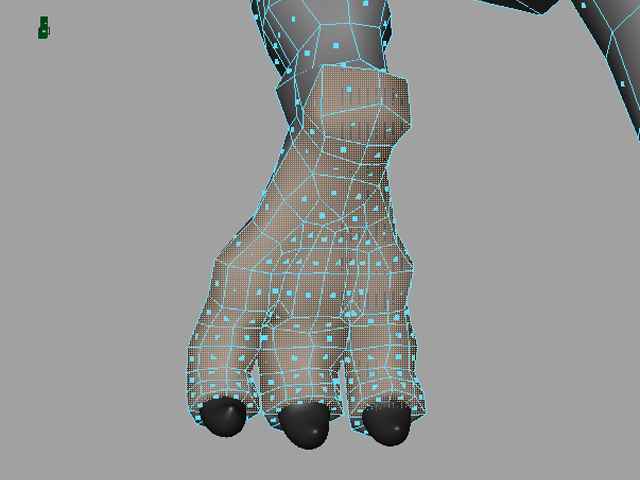
Back of Feet
|
|
|
|
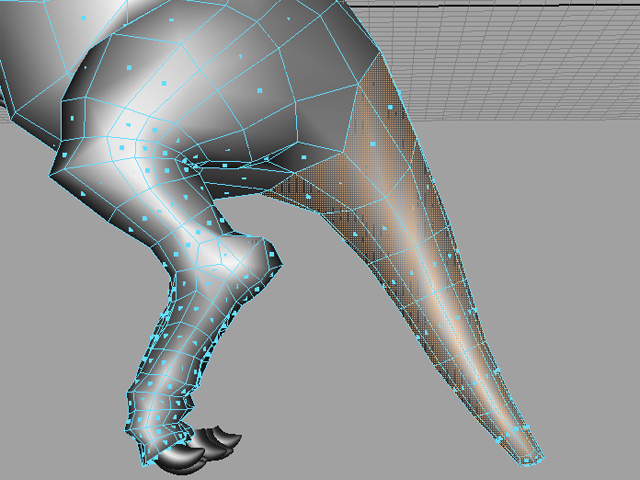
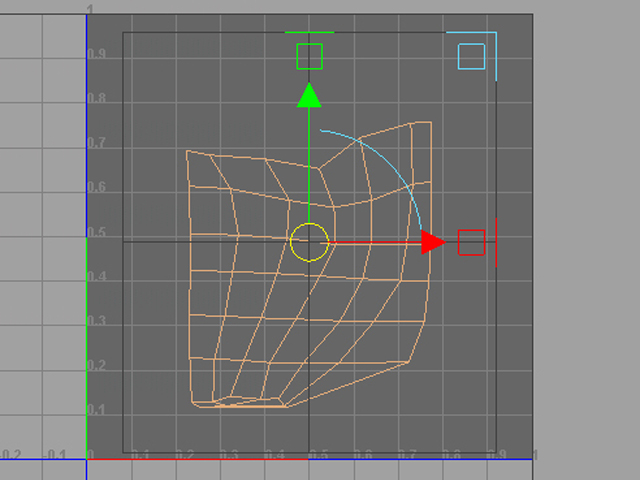
4:Then we assign a projection for each of the divisions that we decided on. The example below uses a Cylindrical Projection for the tail section. You can also try the planar or spherical projection as well. It's just that the tail is shaped more like a cylinder, so a cylindrical projection has a better fit.
|
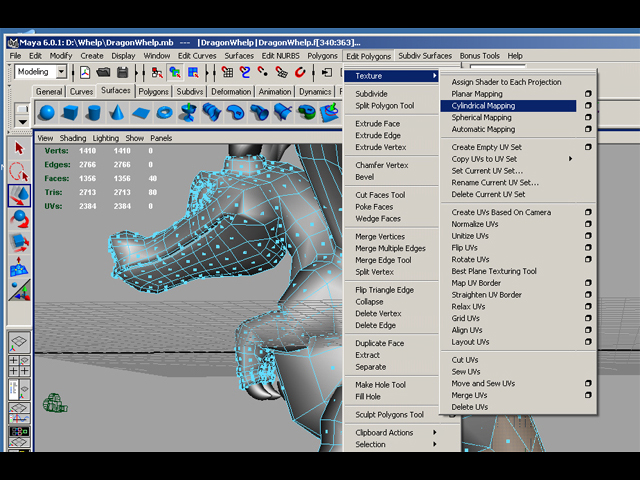
With tail faces/set selected, assign a Polygon UVs>>Cylindrical Projection. Default settings should be fine.
|
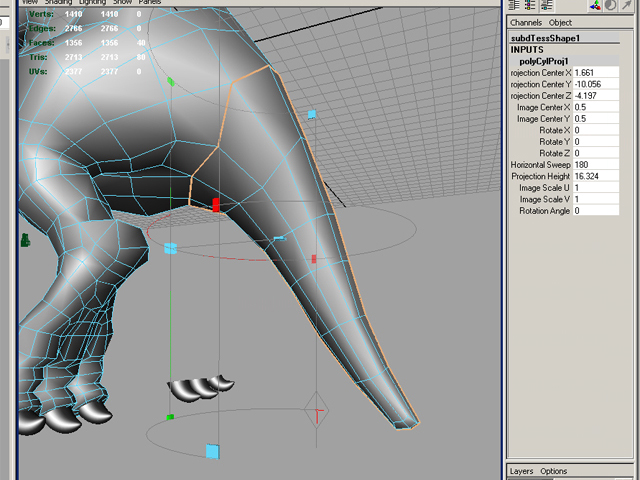
Modifying the Projection in order to fit the tail better. You can use either the modifier at the bottom of the projection, or the settings box to the right.
|
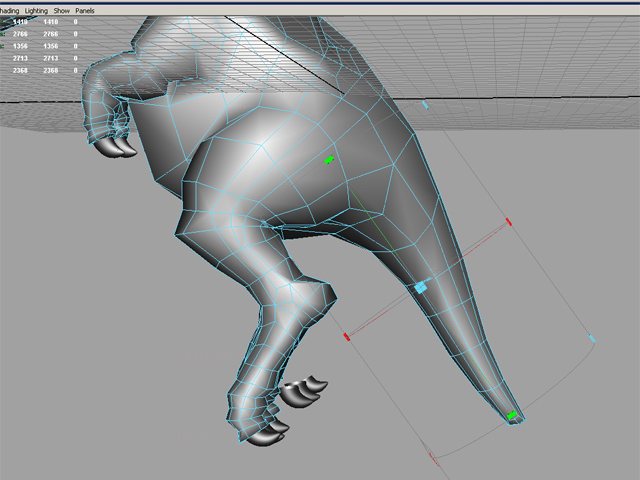
The final position for the projection.
|
|
|
|
5:We open up the UV Texture editor and can see how it has organized the tail.
|
The Tail area when it has been unwrapped by the cyclindrical projection.
|
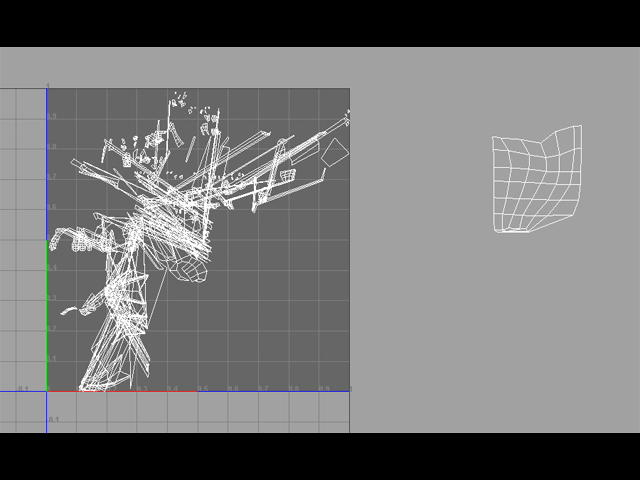
Move the tail faces out of the way for now.
|
|
|
|
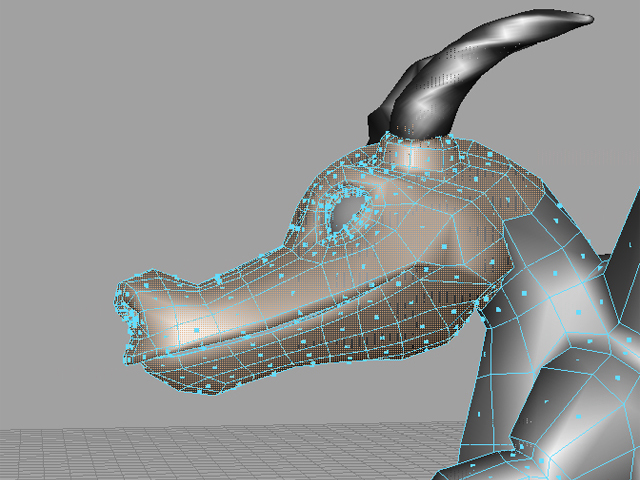
6:Here's an example of the head area being projected upon. A lot of the UVs for the head is overlapping each other, but we will worry about fixing it later. Continue doing this process for the rest of the dragon whelp, using whichever projection works best on the various body parts and then moving them out of the way until every face has been mapped.
|
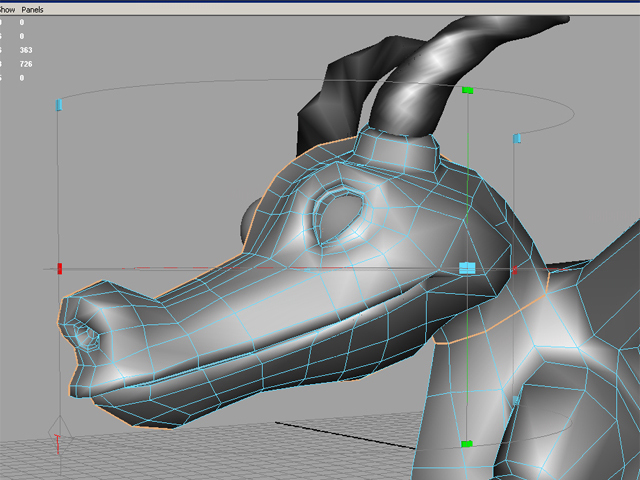
A Cylindrical projection around the head.
|
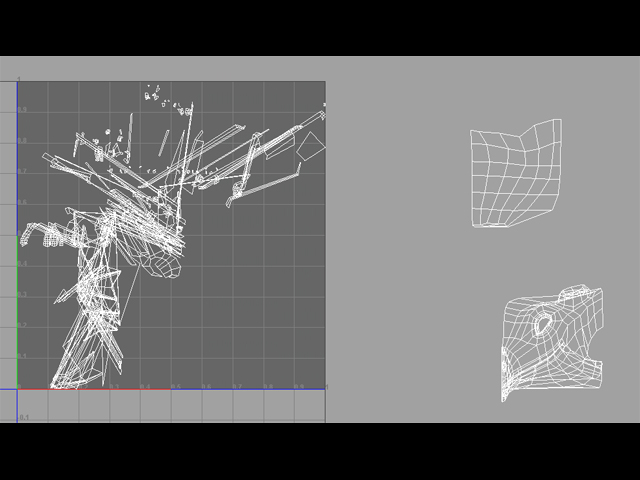
Moving the head faces out of the way.
|
|
|
|
7:Once the different parts of the dragon are sectioned off, you will have to clean up the various parts that have overlapping UVs. Here's a sample of the head area being cleaned up.
|
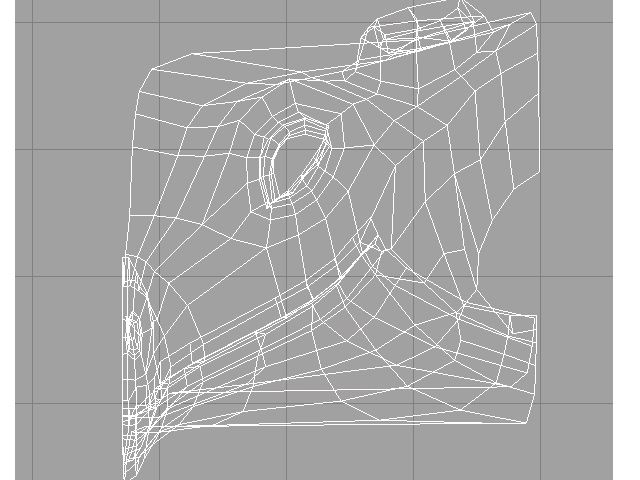
Lots of overlapping UVs around the eyes, horn, mouth, and nostril.
|
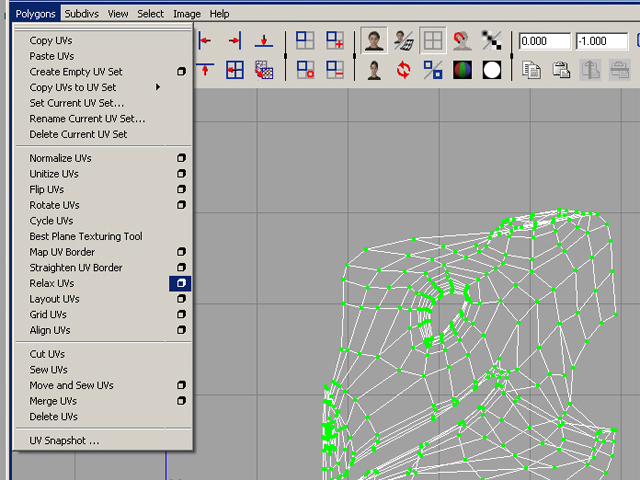
The Relax UVs tool to ease the UVs a bit for better management.
|
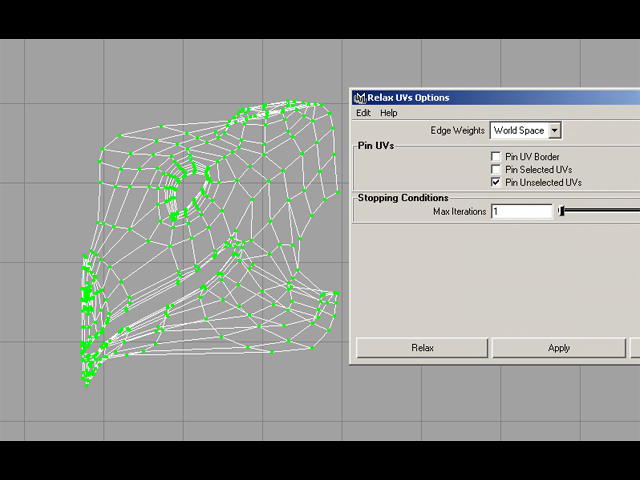
The Relax UVs options box. We want world space because it helps keep the shape relative to how the edges on the actual model is spaced out. Uniform mode does come in handy sometimes for spacing out areas such as the eye.
|

For some areas, the only way to fix it up is to move the individual UVs. Make sure you are in UV mode. Do so by right clicking on the UV Editor screen and select UV.
|
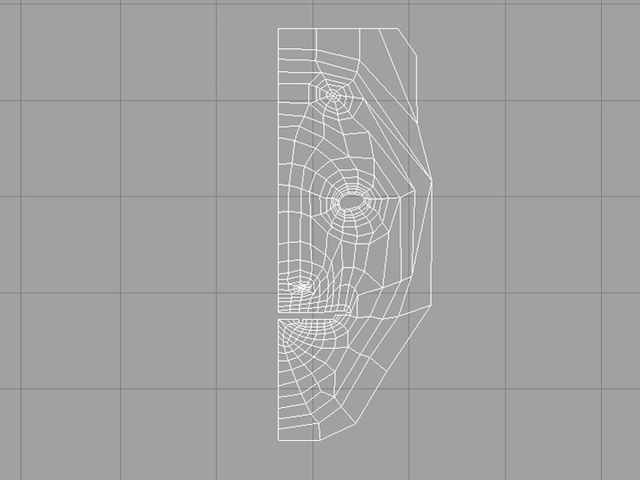
The finished half of the head, where there are no overlapping UVs. Every face is now layed out nice and flat.
|
|
|
|
8:When all the UVs are layed out for this half of the dragon, we can then duplicate the model to create the other half. This new half will retain all the UV information from the original. However, the problem is that they are stacked on top of each other each. So, to get rid of this overlap, we should do a flip UV on the left half of the whelp.
|
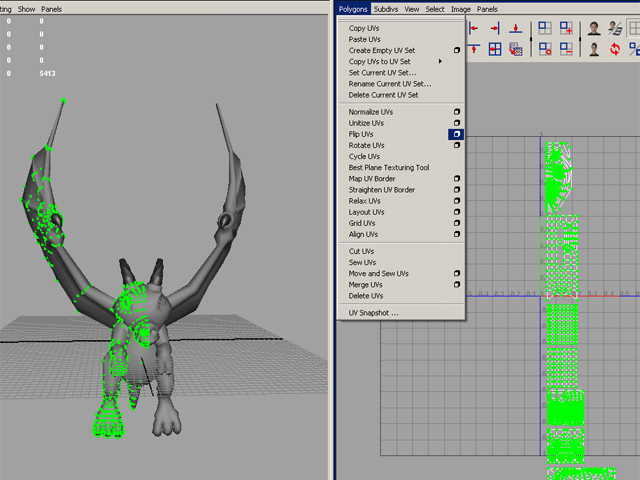
Flipping all the UVs for the left half of the dragon whelp.
|
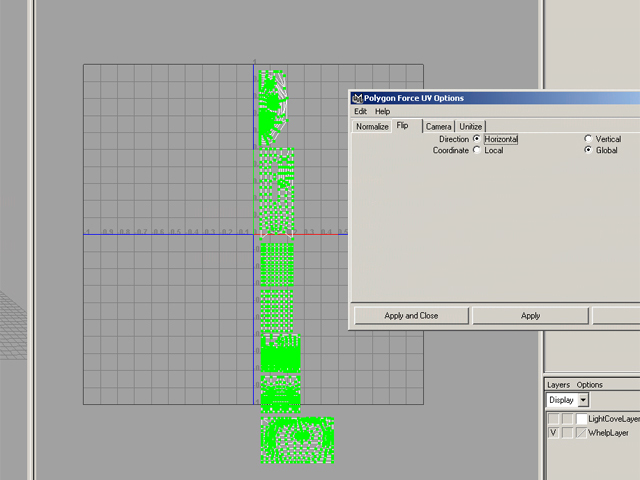
The Flip UV option menu.
|
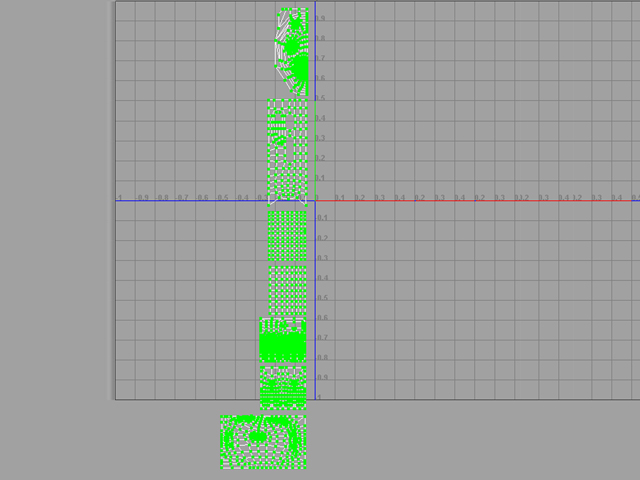
The new UV location for the left half.
|
|
|
|
9:Polygons>>Combine the 2 halves of the dragon and merge all the center vertices.
|
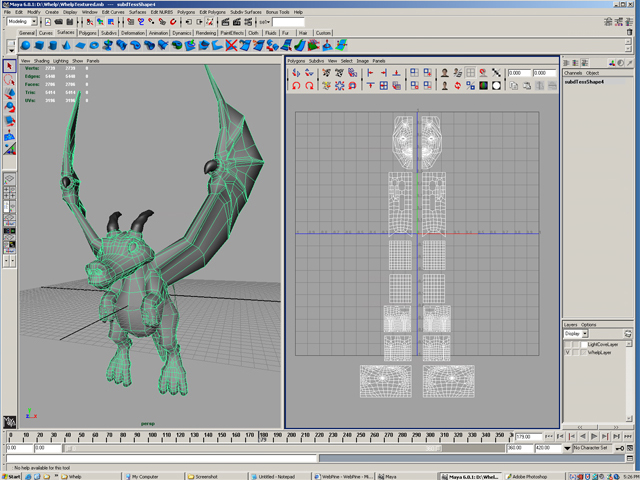
The combined dragon on the left side and the new UV Map on the right. Note: your UV map will most likely have more pieces than the one shown here.
|
|
|
|
10:Now, in the UV Texture Editor, we have to connect some of the areas that would work better as a single piece. For this model, it would probably be best if at least the head and body are a single piece. Though each claw, feet, wing, and tail would work better as a single piece as well. So, instead of 4 shells (the term for each seperate piece of the model in the UV texture editor) for both claws, you would only have 2 shells total, one for each claw. The reason we do this is because the fewer shells that we have in the end, the less seams that we will have to work on fixing during the texture painting process. The example below shows just the head shells being pieced together.
|
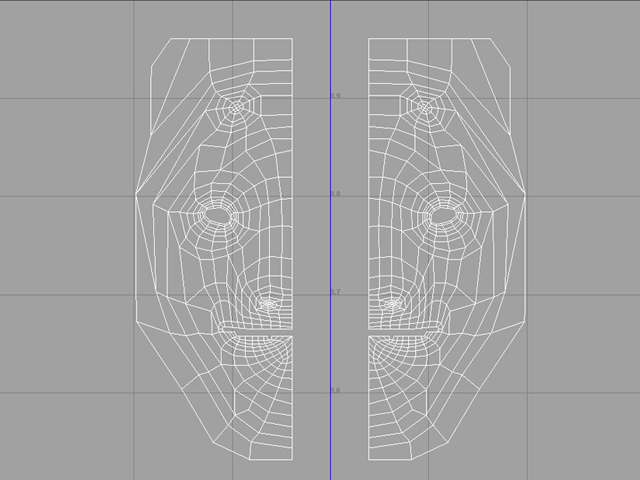
The two seperate shells that makes up the head.
|
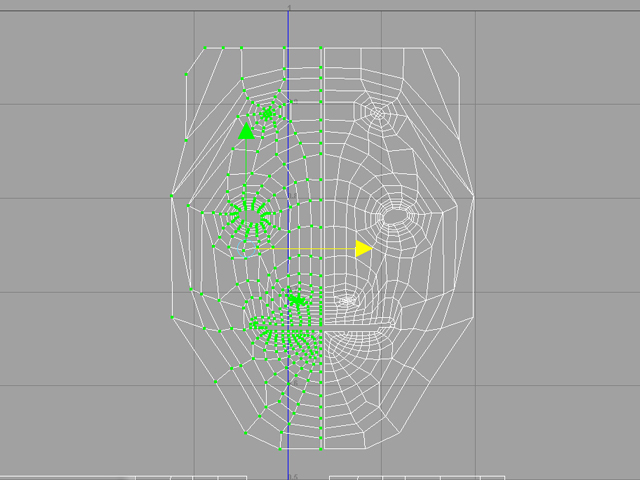
We select all the UVs for one half of the head, and move it closer to the other half.
|
Then we select all the edges where they will be connecting. Of course, you will have to go to Edge Mode in the UV Texture Editor. Just right click anywhere in the Editor and choose the Edge Select Mode.
|
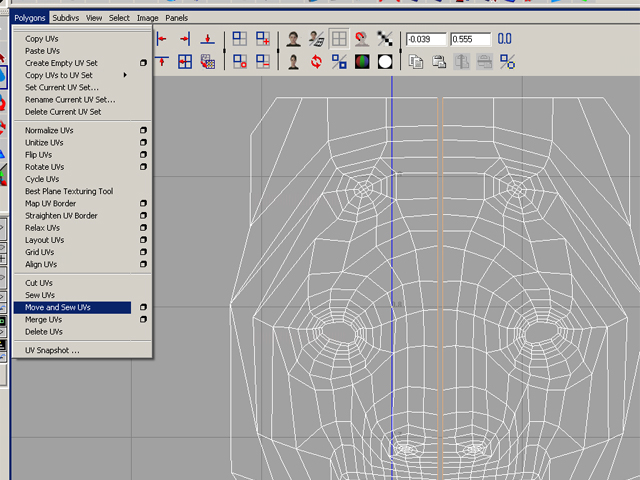
Once all the edges are selected, select the Move and Sew UVs tool in the UV Texture Editor menu. Default settings should be fine. The Sew UVs tool would work as well. Try them both out to see how they differ.
|
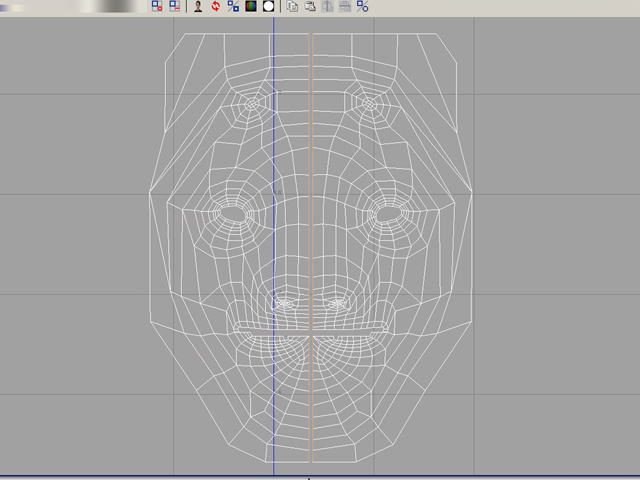
Now we have the head as a single shell in the UV Texture Editor. Repeat for other shells as needed.
|
|
|
|
11:Now we move everything into place. Things have to fit into the top right part of the grid because that's the only area that well be affected by the texture. How you decide to place things is up to you, as long as you try to take up as much space as possible.
|
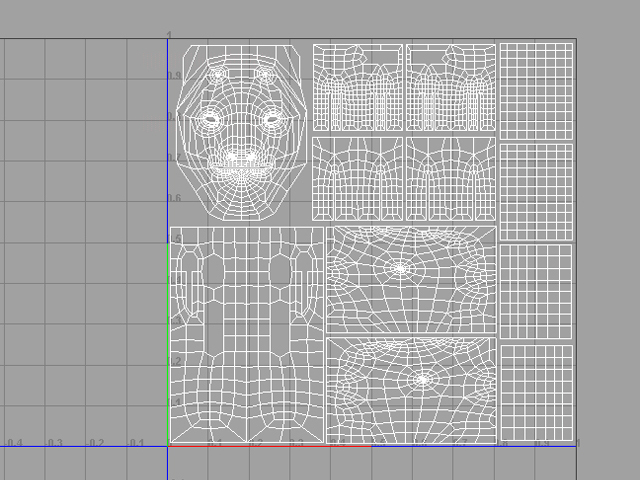
Example of the UV map all layed out in the top right of the UV Texture Editor grid.
|
|
|
|
12:With the UV mapping done, we now must export this image so that we have a reference to paint on. Save it someplace accessible.
|
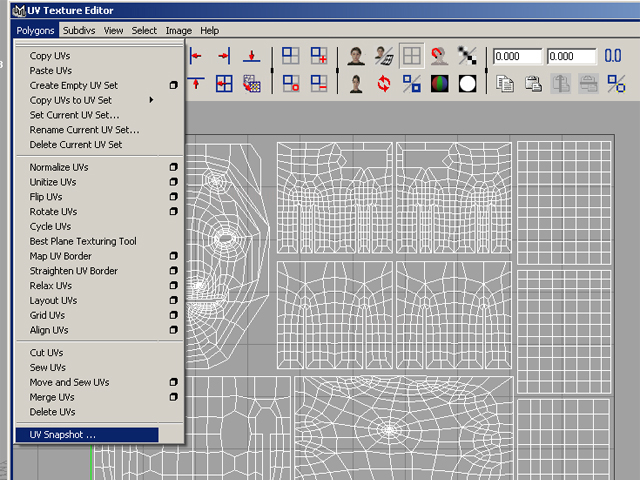
Taking a UV snapshot
|
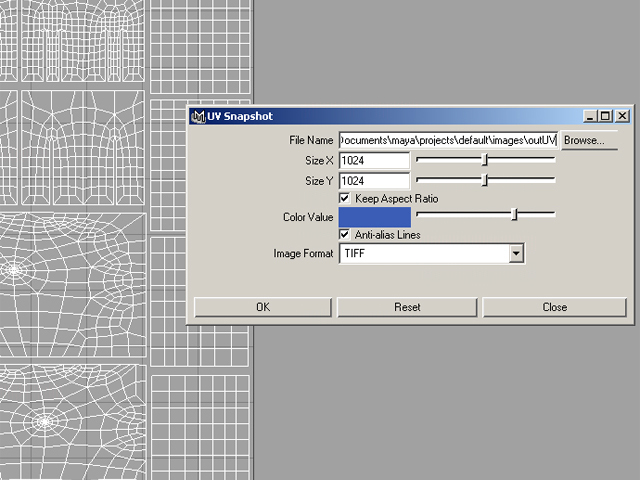
Settings for the UV snapshot.
|