| Head Modeling Tutorial / Step17a
10/11/2005 |
1 | 2 | 3 | 4 | 5 | 6 | 7 | 8 | 9 | 10 | 11 | 12 | 13 | 14 | 15 | 16 | 17 | 18 | 19 | 20 | 21 | 22 | 23 | 24 | 25 | 26 | 27 | 28 | 29 | 30 | 31 | 32 | 33 | 34 | 35 | 36 | 37 | 38 | 39 | 40 | 41 | 42 | 43 | 44 | 45 | 46 | 47 | 48 | 49 | 50 | 51 | 52 | 53 | 54 | 55 | 56

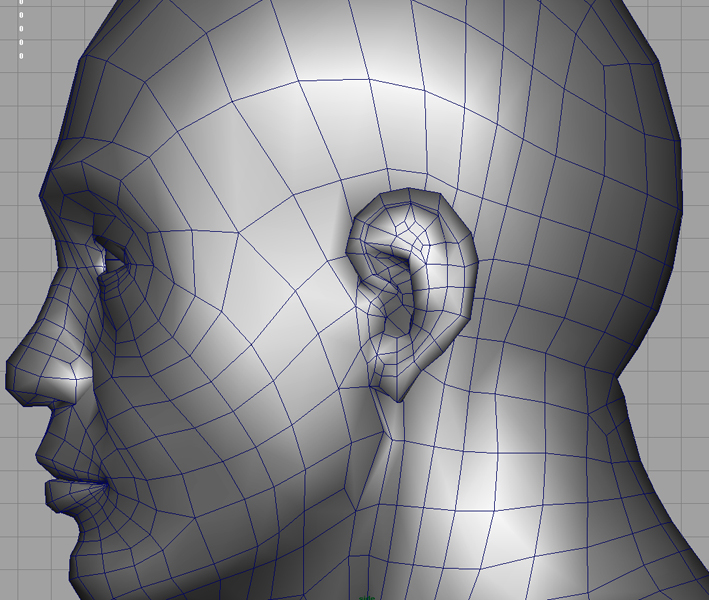
After finishing the ear model, position it next to the head. Delete a few faces on the side of the head where you think you will be connecting the ear to. It is important that the amount of vertices on the part of the ear that will be connected to the head have exactly the same count as the vertices on the newly created hole in the head. More likely than not, you will have to add more edges and vertices in the head area in order to match it up to the ear. use the Split polygon tool to do so. when you are done combine the ear and head with the Polygons > combine tool. Then, merge the ear vertices with the head vertices.