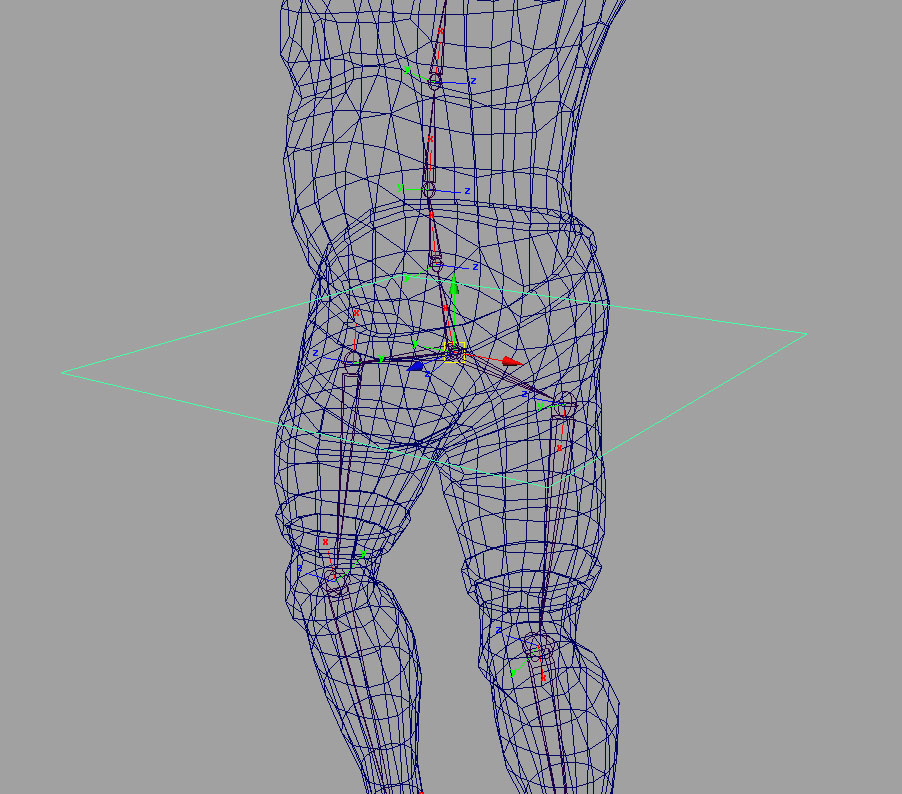
Control for root/pelvis.
Snap the Circle controls to each joint, freeze it's transformation, and then do an orient constraint on it. Select the Control first, then the joint, and then the orient constraint command. Next, we point constraint the newly created spine and neck controls to their respective joints. So, while the Controls will determine how the joints will rotate, the joints themselves will be telling the controls where to translate. Finally, we parent all the spine and neck controls to the Root Control we had set up before.
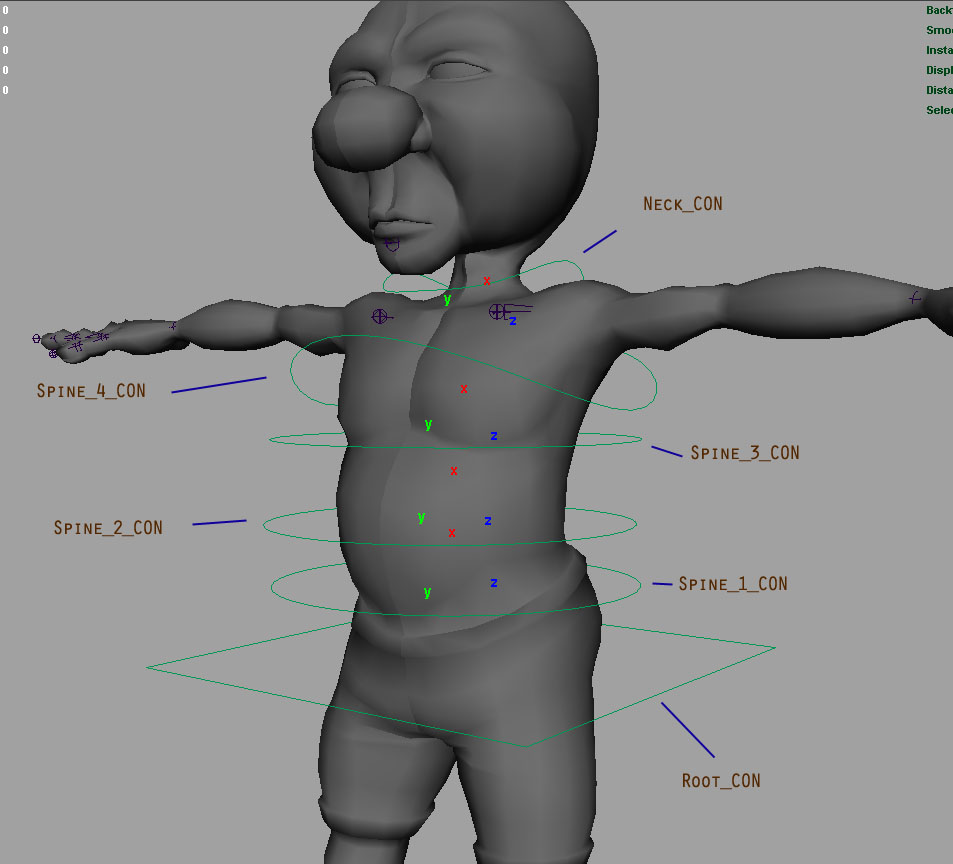
Controls for spine and neck.
For the eyes, we will use the Aim constraint to control it's direction. Create a couple of the locators for the eyes by going to Create>>Locator. Place these in front of the eyes. Select a locator, freeze its transformation, select an eyeball, and then do an aim constraint. Then select both eyes and both locators and parent them underneath the head joint so that they would follow it around.
For the head tilt motion, we will be using Set Driven Keys instead of constraints.
Select the Neck Con, right click on it's channel box, and choose Add Attribute. Give the attribute a name (Headtilt_F or something similar) and use the settings in the image below and then press okay. This will be our forward and backwards head motion attribute.
For the side to side head tilt, create a second attribute (Headtilt_S) with the same settings.
Next we pull up the Set Driven Key by going to Animate>>Set Driven Key>>Set Options. Click on the Neck Con and load that as driver. Click on the Head joint and load that as Driven. For the Driver, select the newly created Headtilt_F attribute. For the driven, find out what rotation direction makes the head tilt forward and backwards and select that as the Driven. With both the driver and driven channel box values at 0, press Key to hook them up together. So now, when the Headtilt_F attribute is at 0, the head joint rotation(X,Y,or Z depending on your rig) will also be 0.
Next we have to set the max forward tilt and the max backwards tilt. Select the Neck control, and change the Headtilt_F attribute to +10. Then Select the Head joint and then rotate it until it reaches the max forward tilt that a human head should have. In the Set Driven Key dialogue box, with all the same selections as before, click key. Now change the Headtilt_F to -10, tilt the head joint back to a reasonable amount, and click key in the Set Driven dialogue box.
If you were to change the values of Headtilt_F from -10 through to +10, you will now see the head tilt forward and backwards. Create the side to side head tilt in the same manner but with the Headtilt_S instead.
The mouth will also be a set driven key, so create a another attribute in the Neck Con channel box called Mouth_Open and then follow the same process as the head tilt.
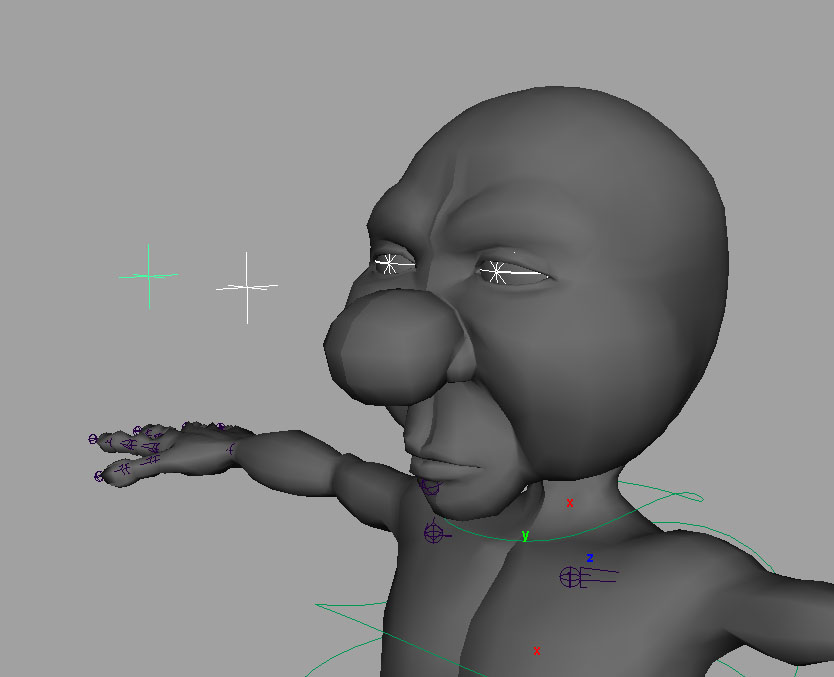
Locators used for the eyes.
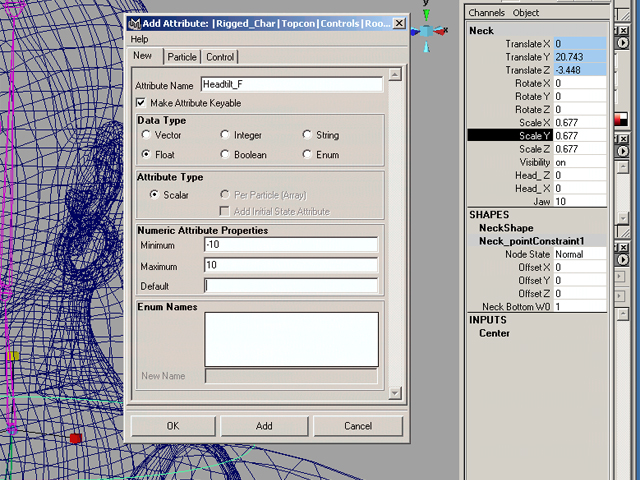
Add Attribute Dialogue Box.
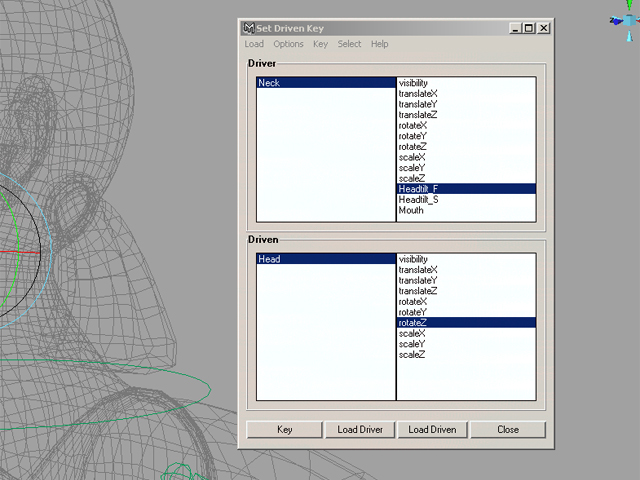
Set Driven Key Dialogue Box.
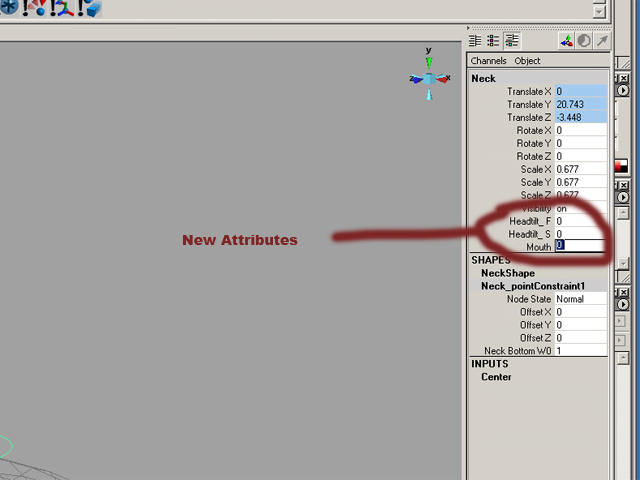
New Attributes.
Select the IK handle tool, Skeleton>>IKHandle, click on the Thigh joint, and then the ankle joint. An IK handle should have been created to let you maneuver the legs. To control the knee rotation we will need a pole vector constraint for the IK Handle. Create a new square control and place it in front of the knee. Select the control first, then the IK Handle, and finally go to Constrain>>Pole Vector.
A reverse foot lets us keep the foot flat while still being able to move the legs. First we duplicate the whole foot chain from the ankle on down. Select the ankle joint, and then go into the Edit >> Duplicate Options panel. Be sure to have "World" instead of "Parent" selected. This will ensure that the new foot is not attached to the main skeleton. Move it a little bit to the side so that we can see both feet joints at the same time. Next, point constrain the IK handle to the ankle of the Reverse Foot. The reverse foot ankle now controls the IK Handle, which in turns controls the leg. To keep the feet from rotating, we Orient constrain each foot joint to the respective joint on the Reverse foot. So, Ankle to Reverse_ankle, Heel to Reverse_Heel, Toe to Reverse_toe. Then we put a new Square Con under the foot, freeze its transformation and Point and Orient constrain the Reverse foot ankle to the Con. To make the toes roll up and down, we will need another Set Driven Key setup. Create a new attribute on the foot con and hook it up to the toe joints just like the way we did with the head tilt setup.
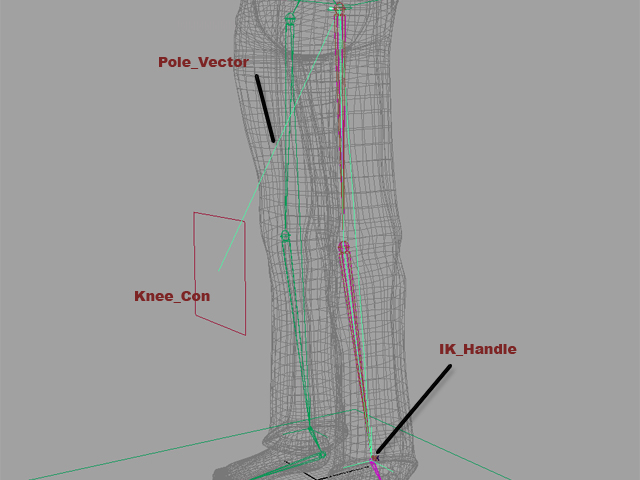
Leg IKs.
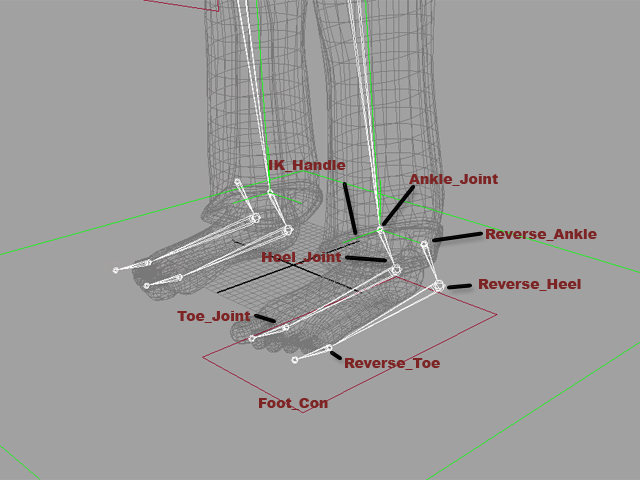
Reverse Foot Setup
Select the IK Handle tool and click from the Shoulder joint to the forearm joint. Put a new square con behind the elbow, freeze it's transformation, shift select the new Ik Handle and use the Pole vector constraint. Put put another control near the hand and point constrain the IK Handle to it. That should do it for general movement of the arm.
To control the rotation of the wrist, we will be using Set Driven Keys again. Create 2 new attributes on the Hand Con. Wrist_UD (Up and down) and Wrist_Side. Hook up the new Wrist attributes to the corresponding wrist rotation exactly the same way we did for the other Set Driven Key setups.
Controlling the fingers require a lot more work and even more attributes. For each finger, we will need a Finger_Curl and a Finger_Spread attribute. The finger_spread attribute is pretty straight forward. Just hook it up to its corresponding finger's sideways rotation.
For the Finger_Curl, you will have to hook up the all 3 joints in a finger to the same Attribute. For Example, the Pinky_Curl Attribute would control the rotations for the 3 joints on the pinky finger. They would all rotate at the same time when the Pinky_Curl attribute is being modified.
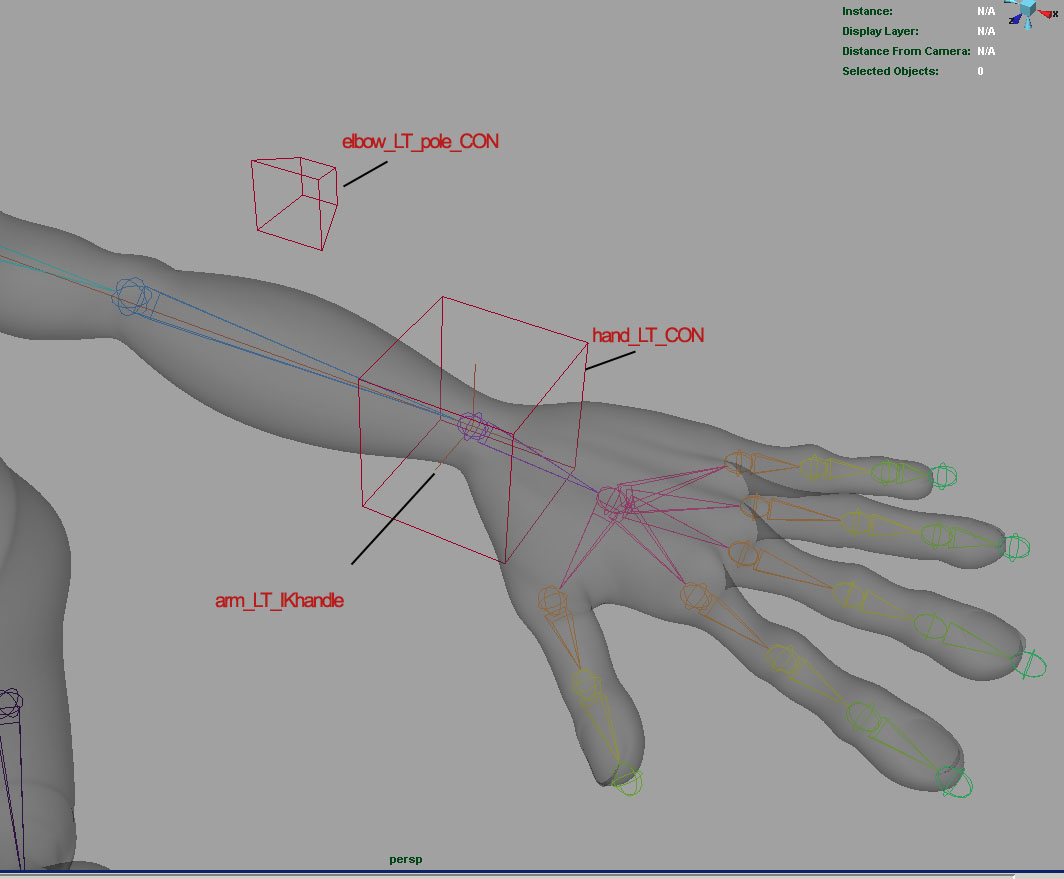
Arm Joints, IK, and Cons.
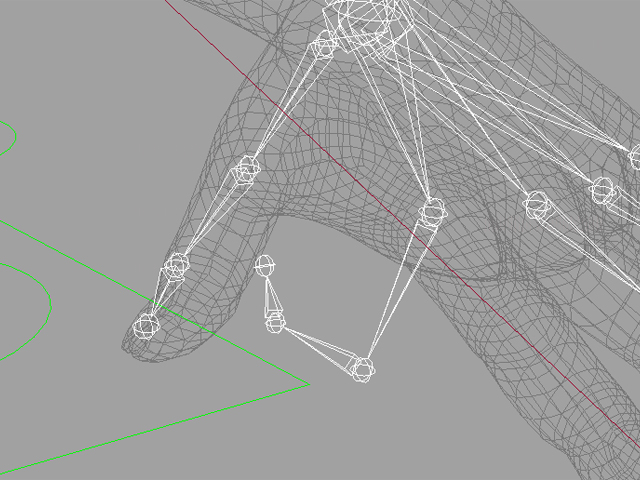
Finger Joint being curled.
Rigging is all about hierarchies. The skeleton itself is just one big hierarchy and all the controls and IK Handles have to be parented and grouped accurately for the rig to work. What you need to do is create a new control shape and place it underneath the model in the viewport. This will be our Top_Con, the control that will let us move and rotate all the joints, ik's, objects, and controls. Group the IK Handles into one big node, joints into a single node, and the controls into a node. Now parent them to the Top Con. The actual model itself needs to be on the same lvl as the Top Con in order for it to work.
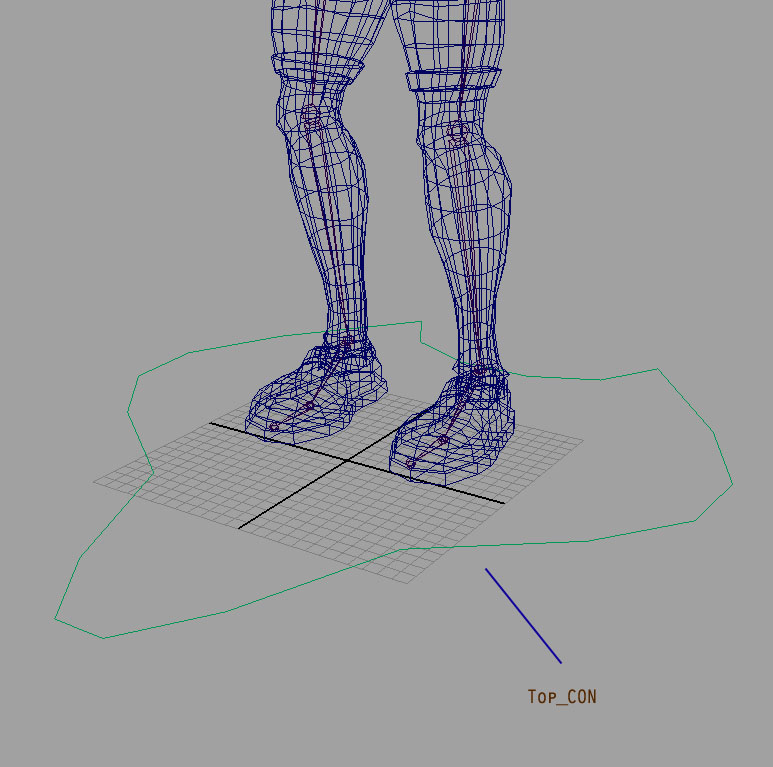
Top CON.
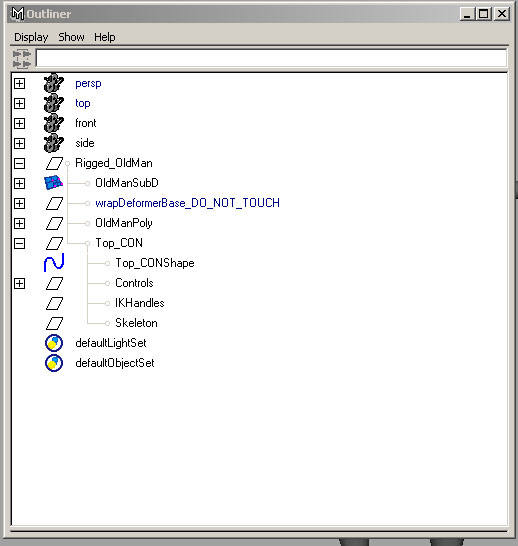
Rigging Hierarchy.
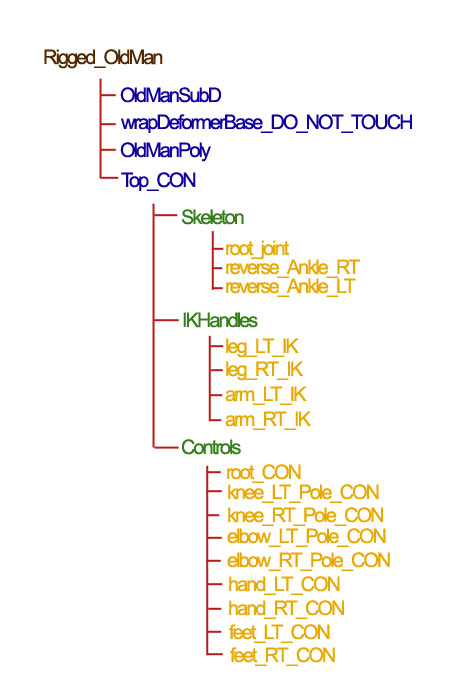
A clearer view of how the hierachy is set up.